This guide is for advanced users with intricate knowledge of AWS and its services. If you're new to static sites you can try out Netlify they're a super simple way to deploy static sites. If you're asking why do it at all, its for bonus cool points.
How do we go about it ?
Here are the steps of how to deploy it:
- Git your code
- Using CodePipeline Trigger to add code to S3
- Serve the contents of S3 over Cloudfront
Feel free to skip ahead to anything you've already done.
Git
You can use any of the following services to maintain your code
Once you have all your code commited and ready, move on to the next step.
Using CodePipeline Trigger
AWS CodePipeline is a tool that looks for commits and pulls made to a git repository and triggers an action on the code. Action may be postprocessing of data, building container images, exporting static files and so on.
Go to the CodePipeline section and use the
Create pipelinebutton.
Name your pipeline and use the New Service Role, it should give you enough permissions to make it work.
 Click on next
Now choose the source of code
 One you choose your source, AWS will ask you to connect your repo to the pipeline. Provide all necessary permissions. Click Next.
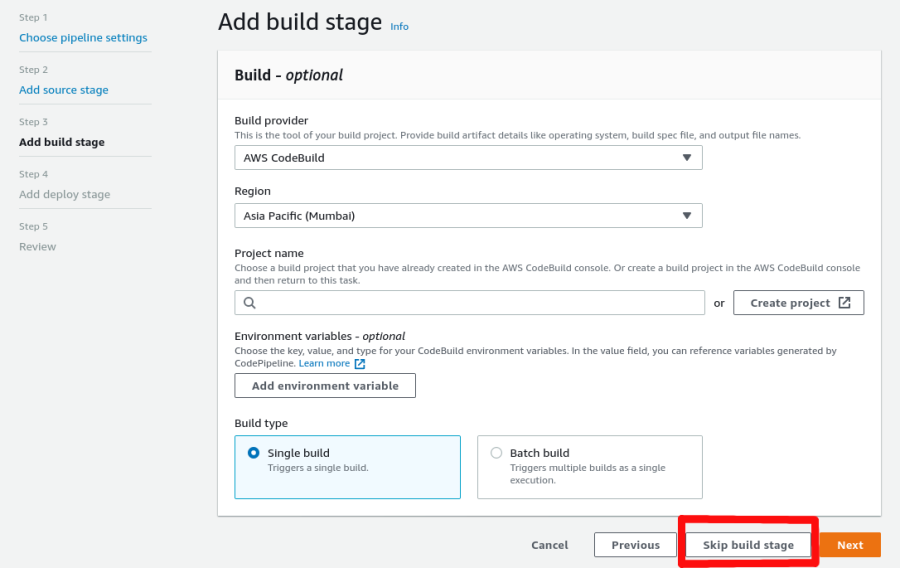
Skip the buid Stage
Button is located at the bottom of the page

Skipping build stage implies that you already have deployable
index.htmlin your git repo. If you do not consider using a build stage.Choose AWS S3 as your deploy stage
 Choose any of your S3 buckets
Check the Extract file before deploy option

Review and create your pipeline
Now commit a change to your code and check if its being executed.
Click on the pipeline you just created and view its history. If the trigger has been setup correctly, here's what you'll see.

Setting up CloudFront
Cloudfront is AWS CDN service that can serve objects from globally cached edge nodes. It can be used to serve images, css, html, php and all static assets. Video Livestreaming is also possible.
Create a new distrubution
Navigate to the AWS Cloudfront service and create a new distrubution.
Choose the S3 bucket you want to serve from.

Use the Origin Path option to make sure you serve the right files. Here's an example of what it looks like:

Configure a few more options
Leave most options to their defaults, here are a few I recommend changing:Compress Objects Automatically: YES
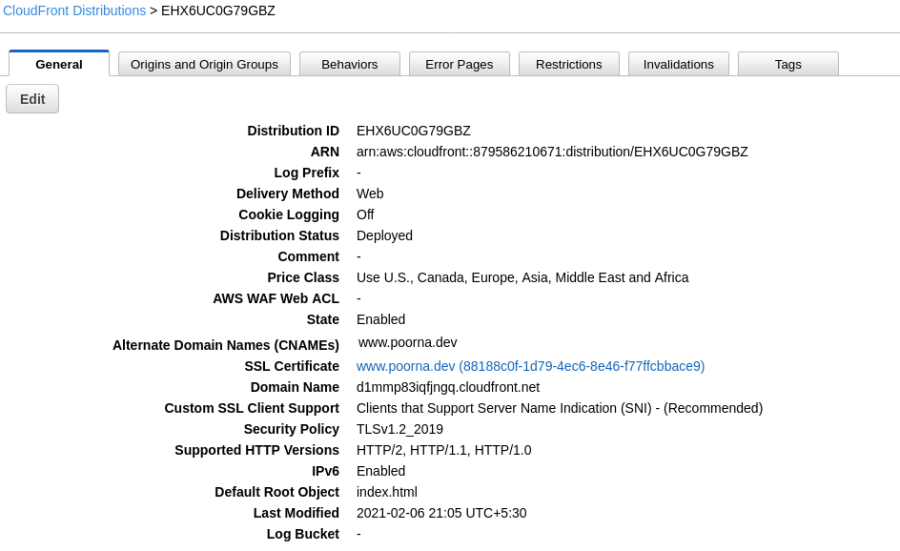
Alternate Domain Names: < custom domain >
If you want a custom domain, AWS automatically provisions a SSL certificate.
Custom SSL Certificate
Click Deploy and you are done.
Now you must have a cloudfront domain deployed at your custom domain
Here's how the Cloufront Distrubution looks once its done! 
